How to Send an Assignment Request (AR)
This guide explains how a Customer can submit an Assignment Request (AR) to configure routing for leased IP-Blocks.
1. Prerequisites
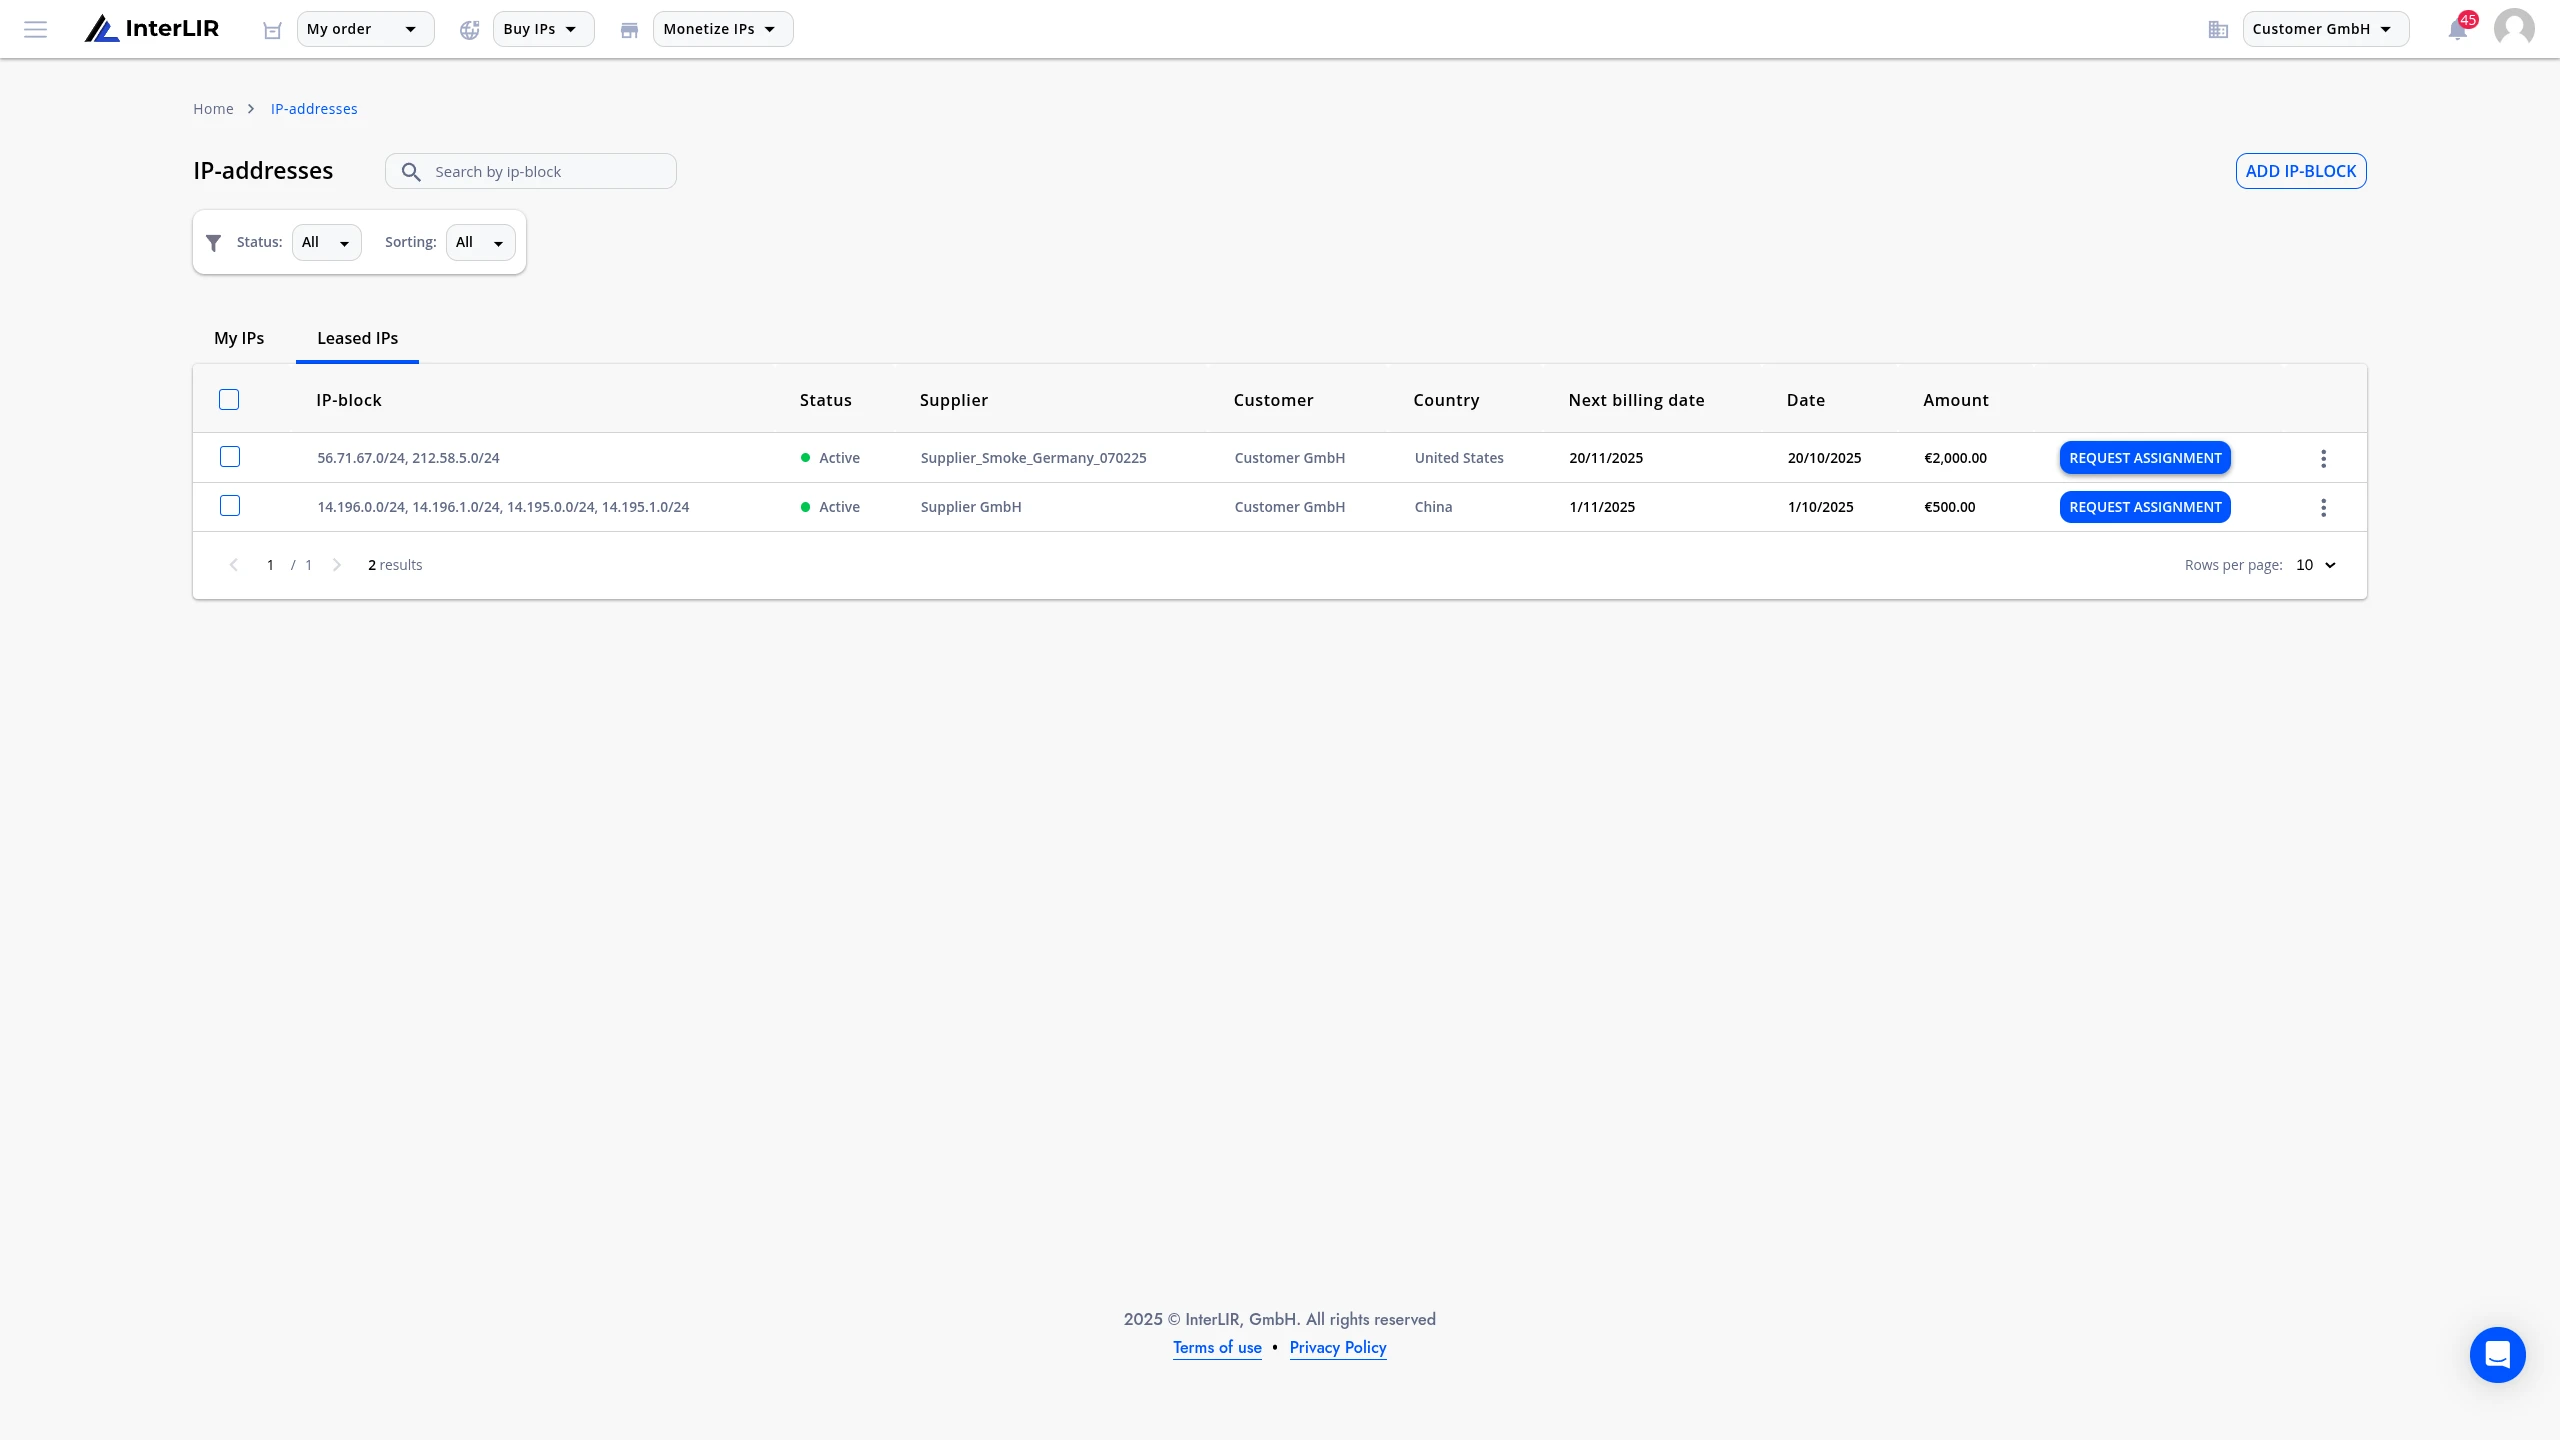
To create an Assignment Request, the customer must first have at least one active lease. After successful payment:
- A modal window will prompt the user to submit an AR immediately.
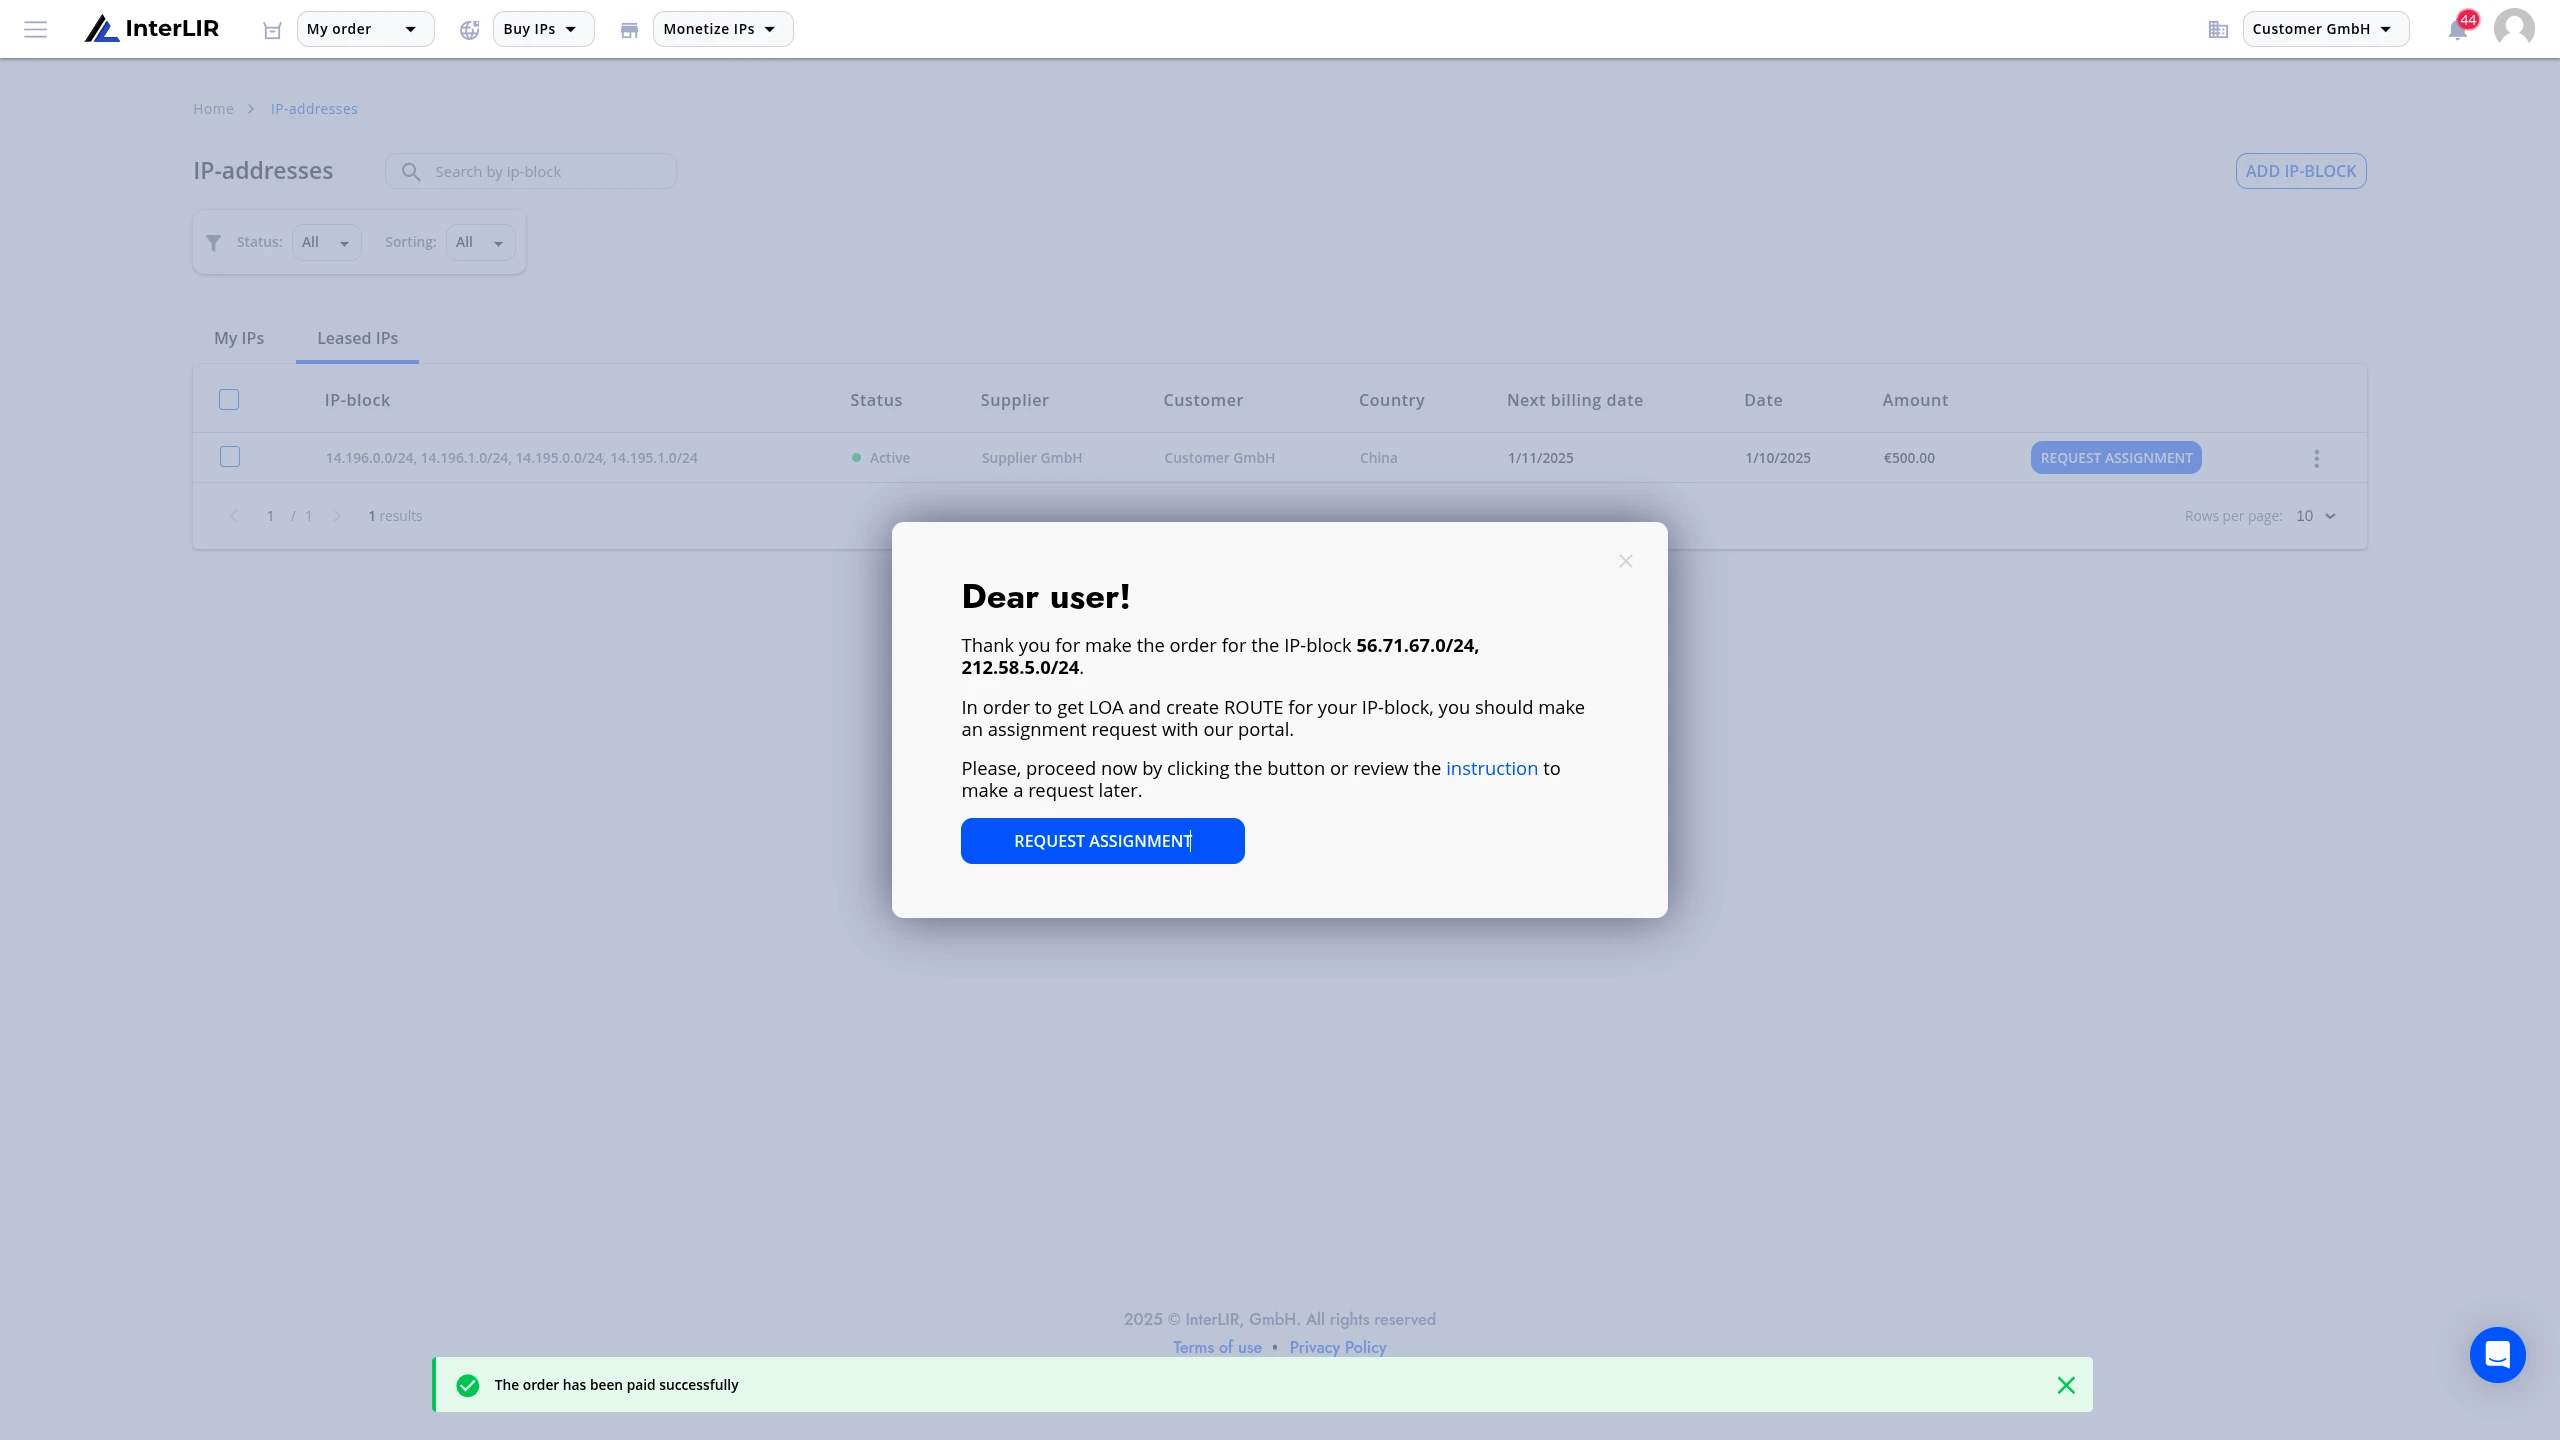
- Alternatively, the user can:
- Click Request Assignment from the Orders page (if needed, switch to the Leased IPs tab to view the page with your lease contracts)
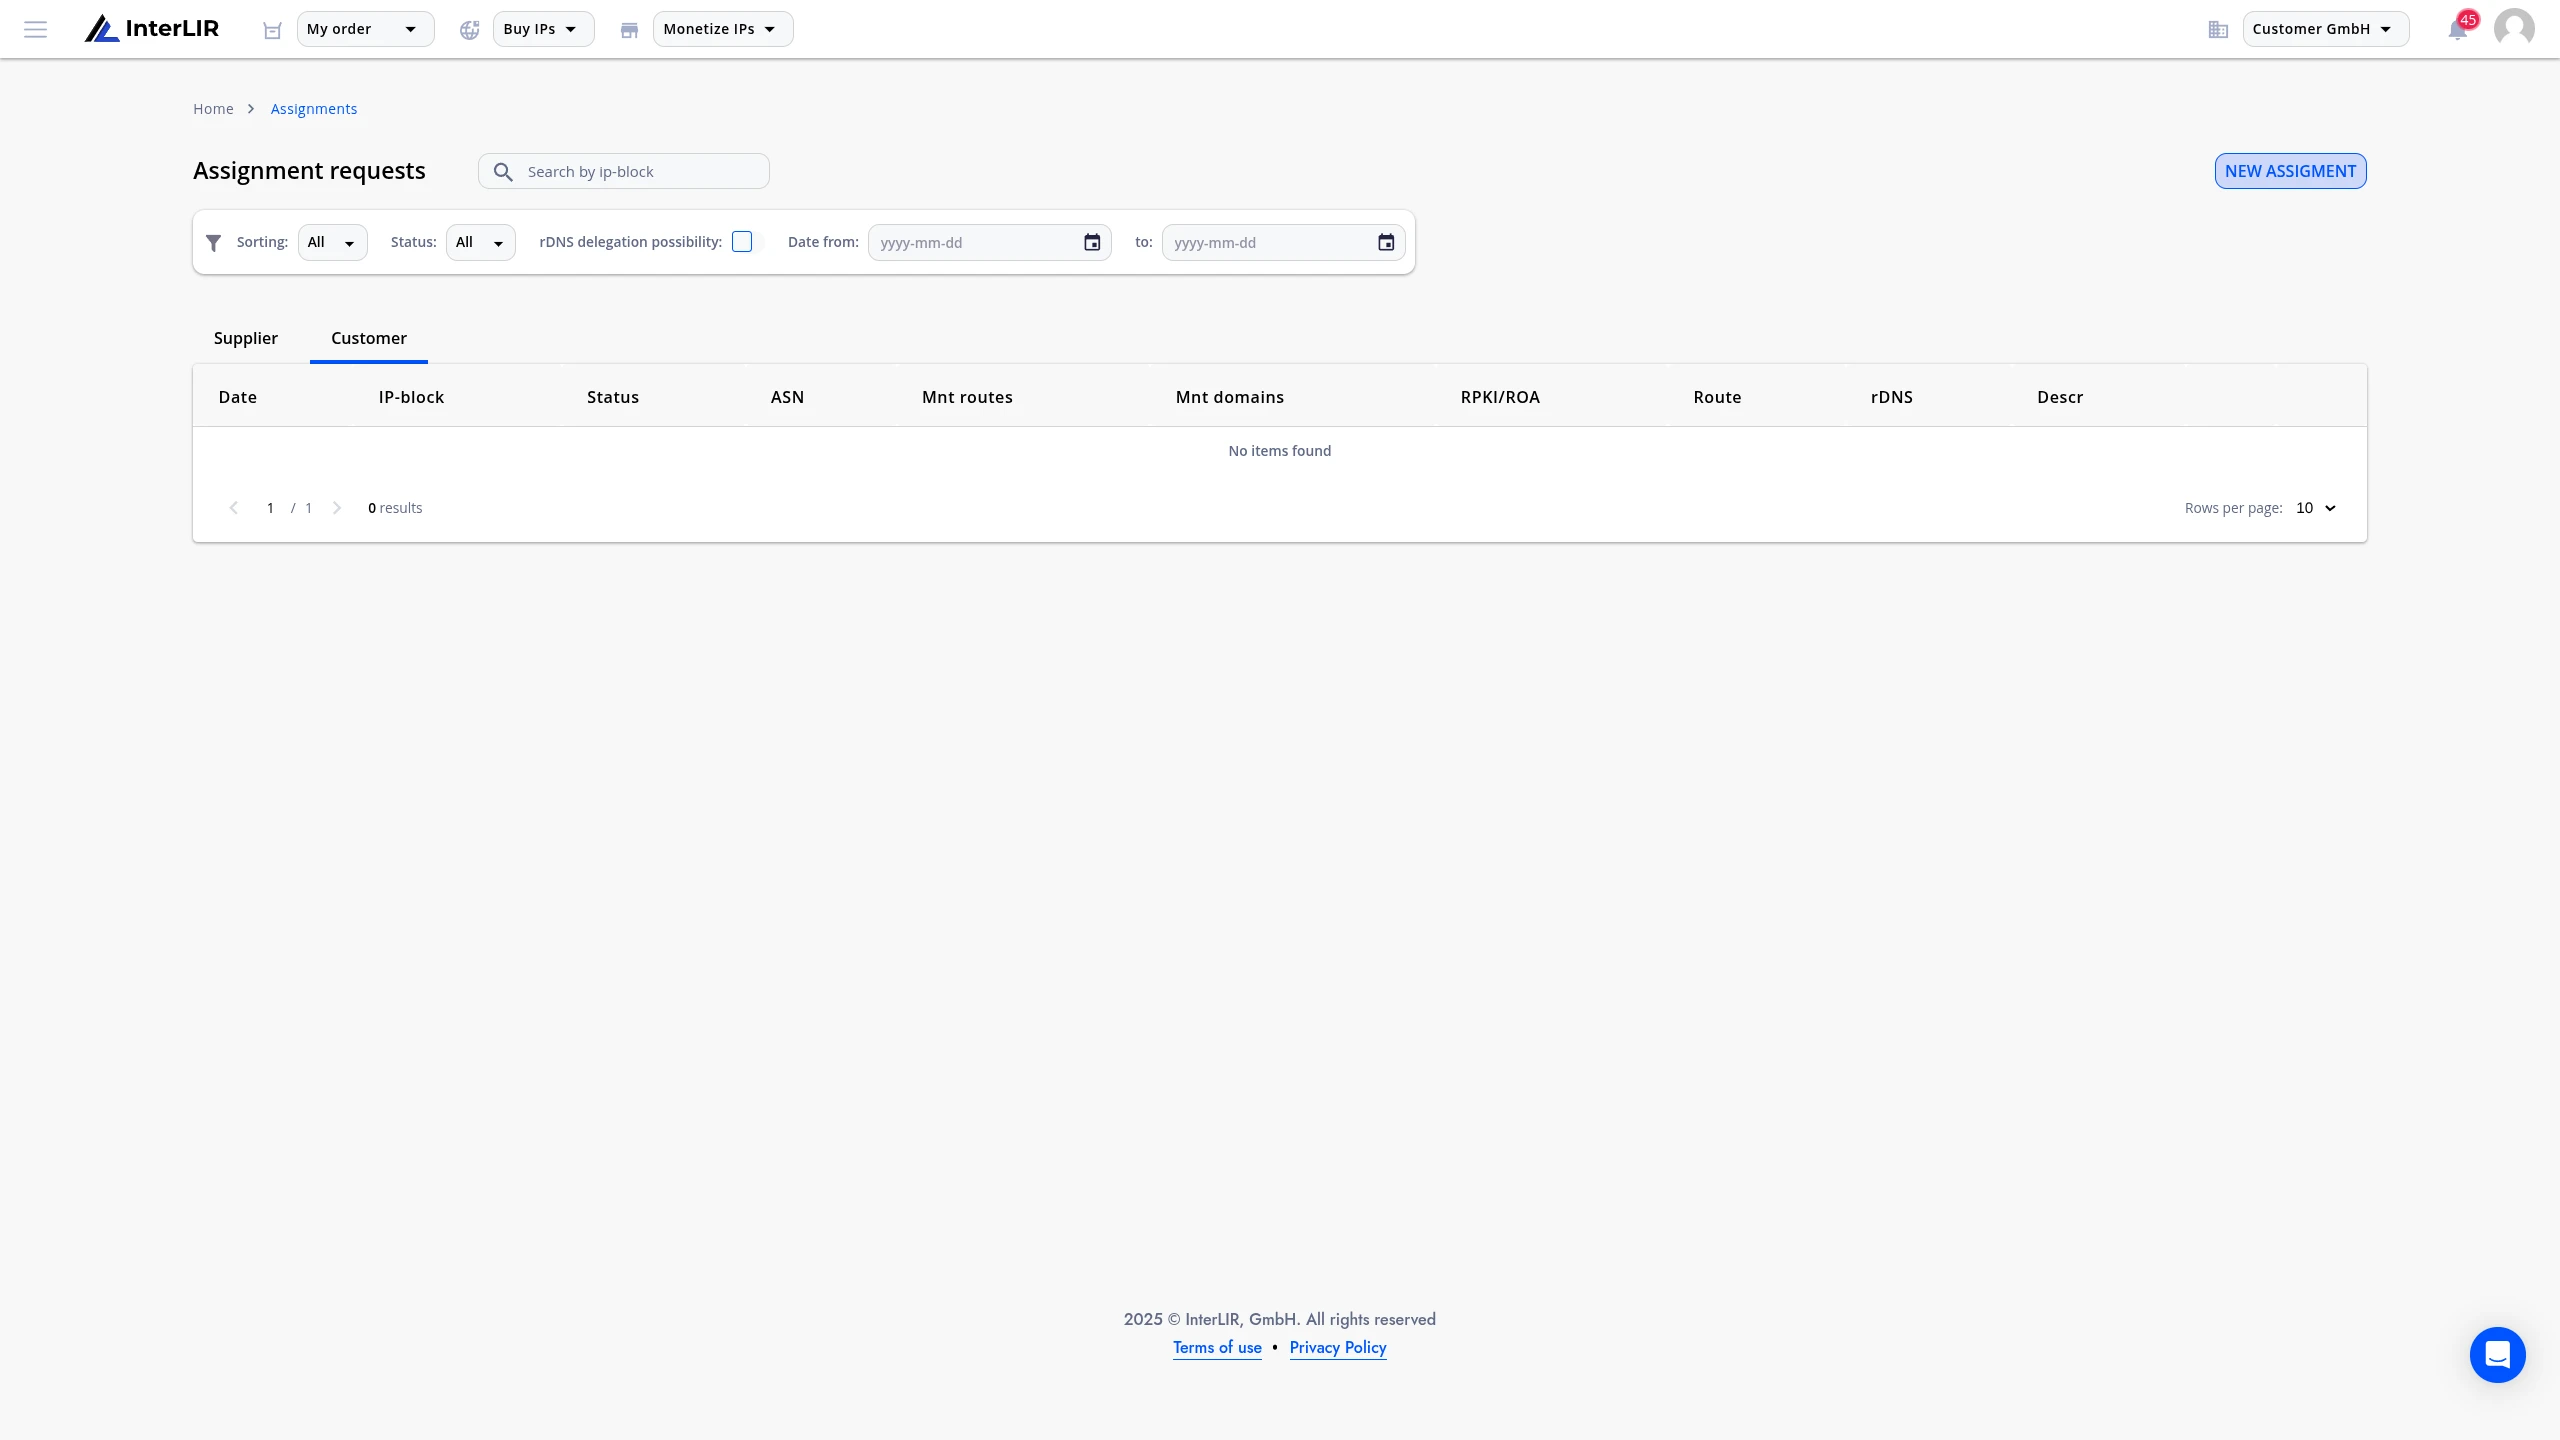
- Or visit Assignment page and click New Assignment
2. Selecting IP-Blocks
In the opened form:
- Choose one or multiple leased blocks to include in your AR
- Multiple requests can be submitted simultaneously
3. Filling Out the Assignment Request Form
You must:
- Select the required ASN (or use the Add Additional ASN button to add a second ASN)
- Fill in additional fields depending on the RIR of the block
🛈 Note: Some ASNs may contain comments from their owners. Please read and take them into account before submitting.*
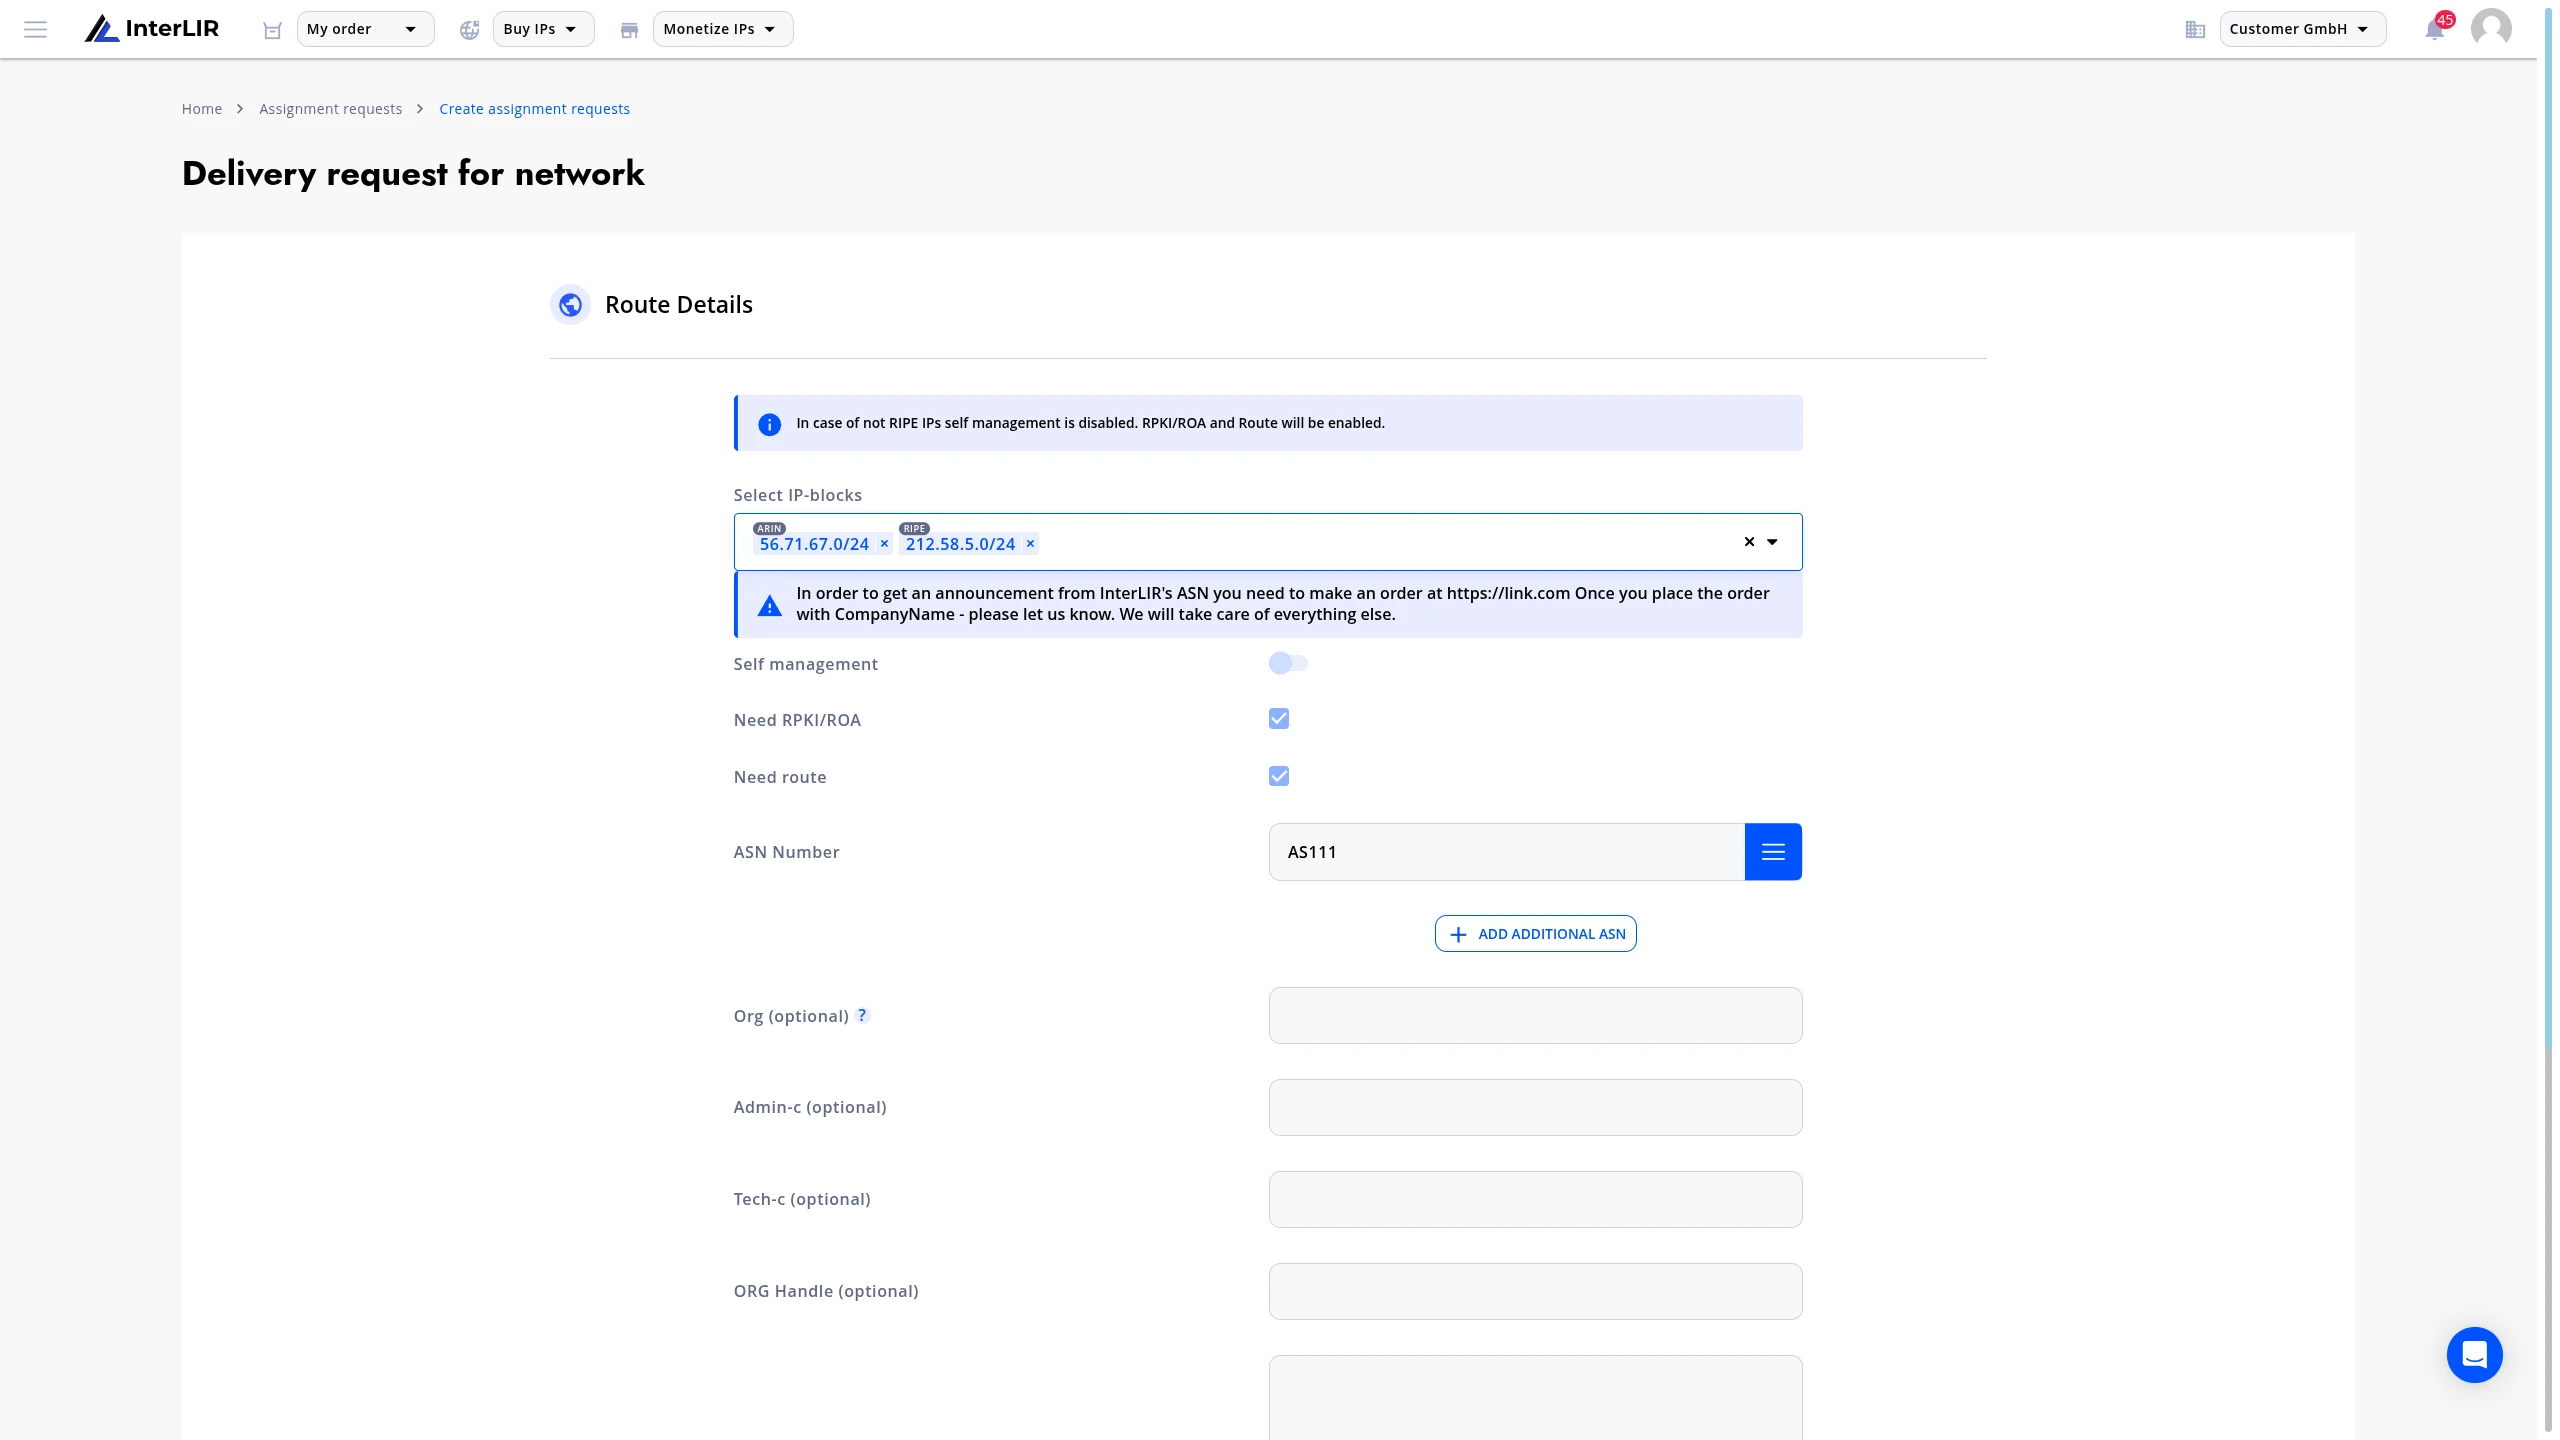
RIR-specific behavior:
- For RIPE blocks:
- When the Self Management toggle is active, you can enter RIPE Attributes:
mnt-domainsmnt-routes
- Optional fields:
orgadmin-ctech-c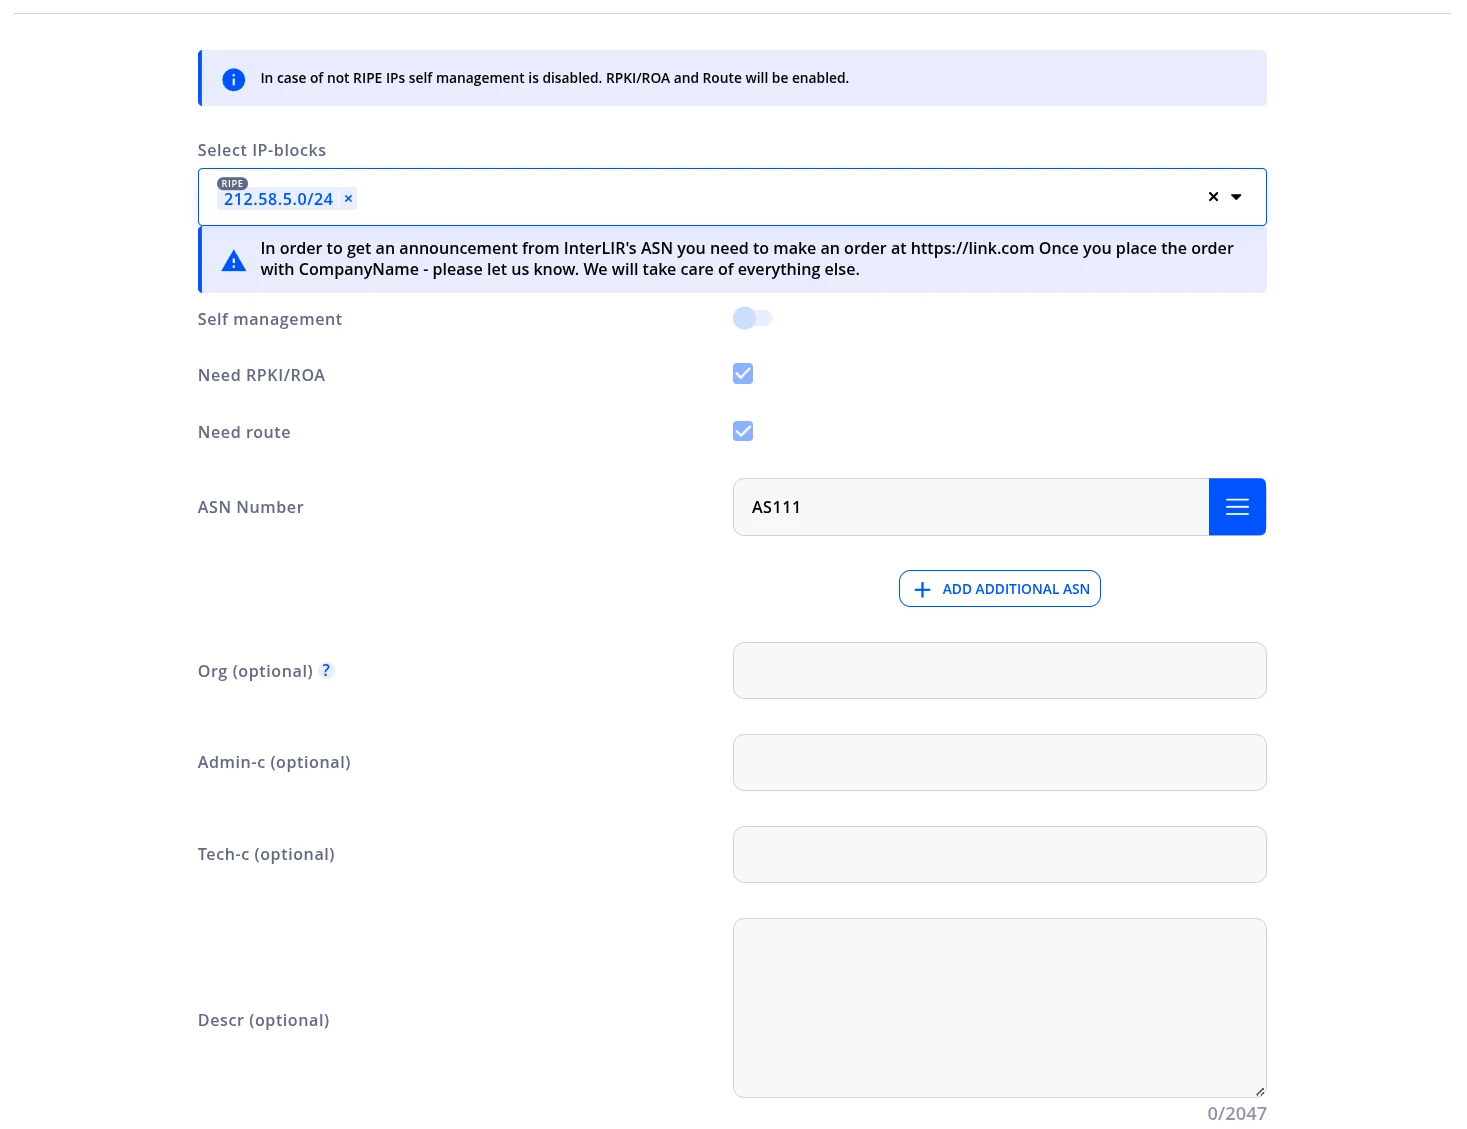
- When the Self Management toggle is active, you can enter RIPE Attributes:
- For ARIN blocks, you can enter ARIN Attibutes:
- Optional field:
ORG Handle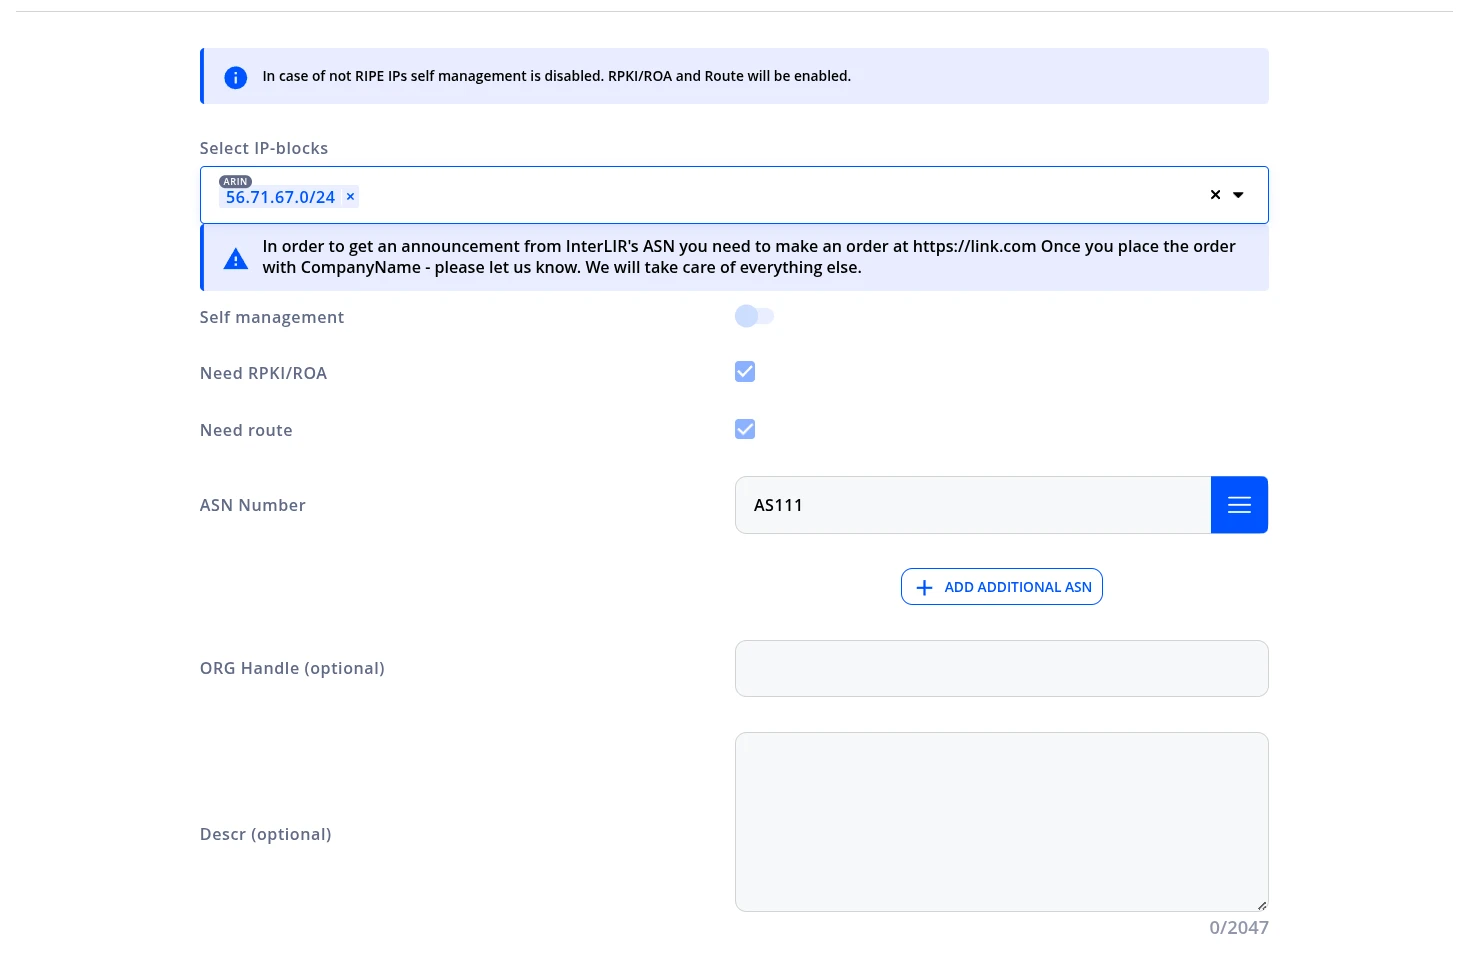
🛈 If submitting a request for multiple blocks from different RIRs, don’t worry — irrelevant fields will be ignored during processing depending on the RIR.
- Optional field:
BYOIP verification token
If you are onboarding leased space through a cloud provider BYOIP (Bring Your Own IP) workflow, paste the provider’s verification token into the DESCR field exactly as supplied (including BEGIN/END wrapper lines if your provider requires them). See How to Use BYOIP.
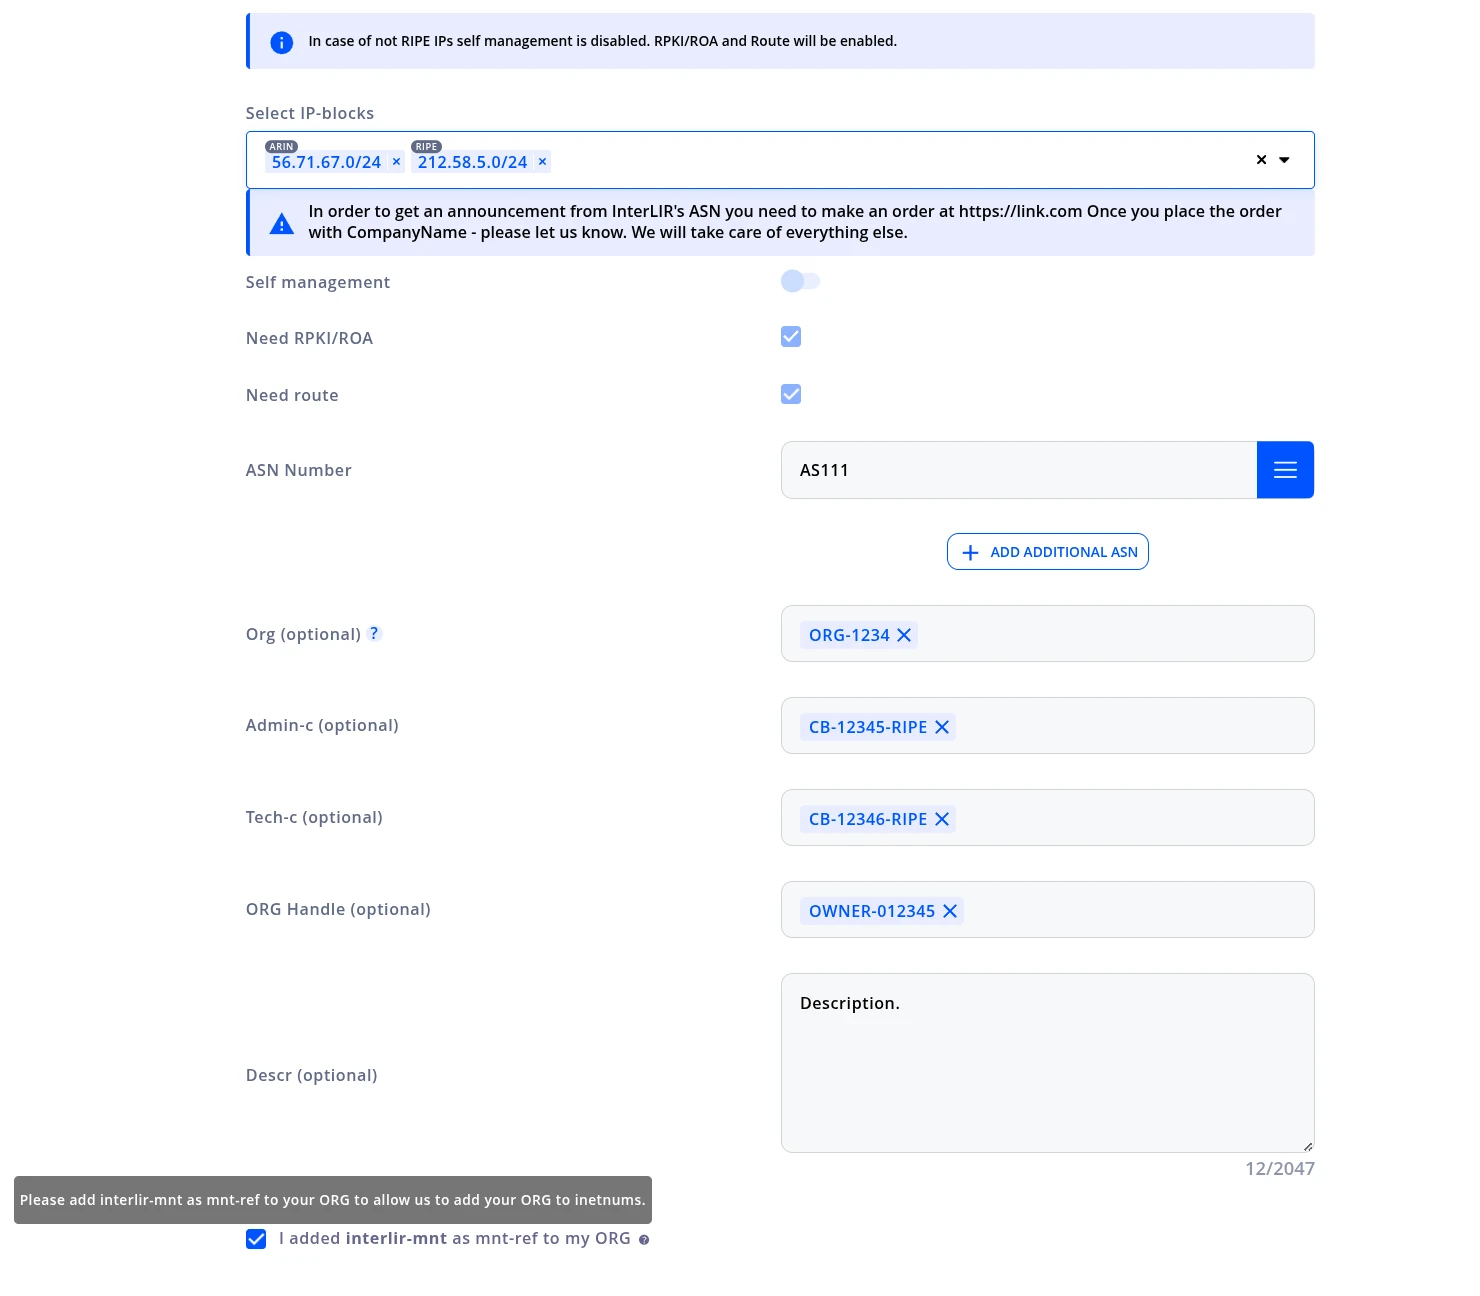
🛈 If you filled in the ORG field while completing the form, you must also uncheck the checkbox
"I added interlir-mnt as mnt-ref to my ORG"after actually performing that action in your RIR system.
This step confirms that the required maintainer has been added before sending the request.
4. Sending the Request
Click Send Request to submit the AR. The request will move into Waiting for approve status.
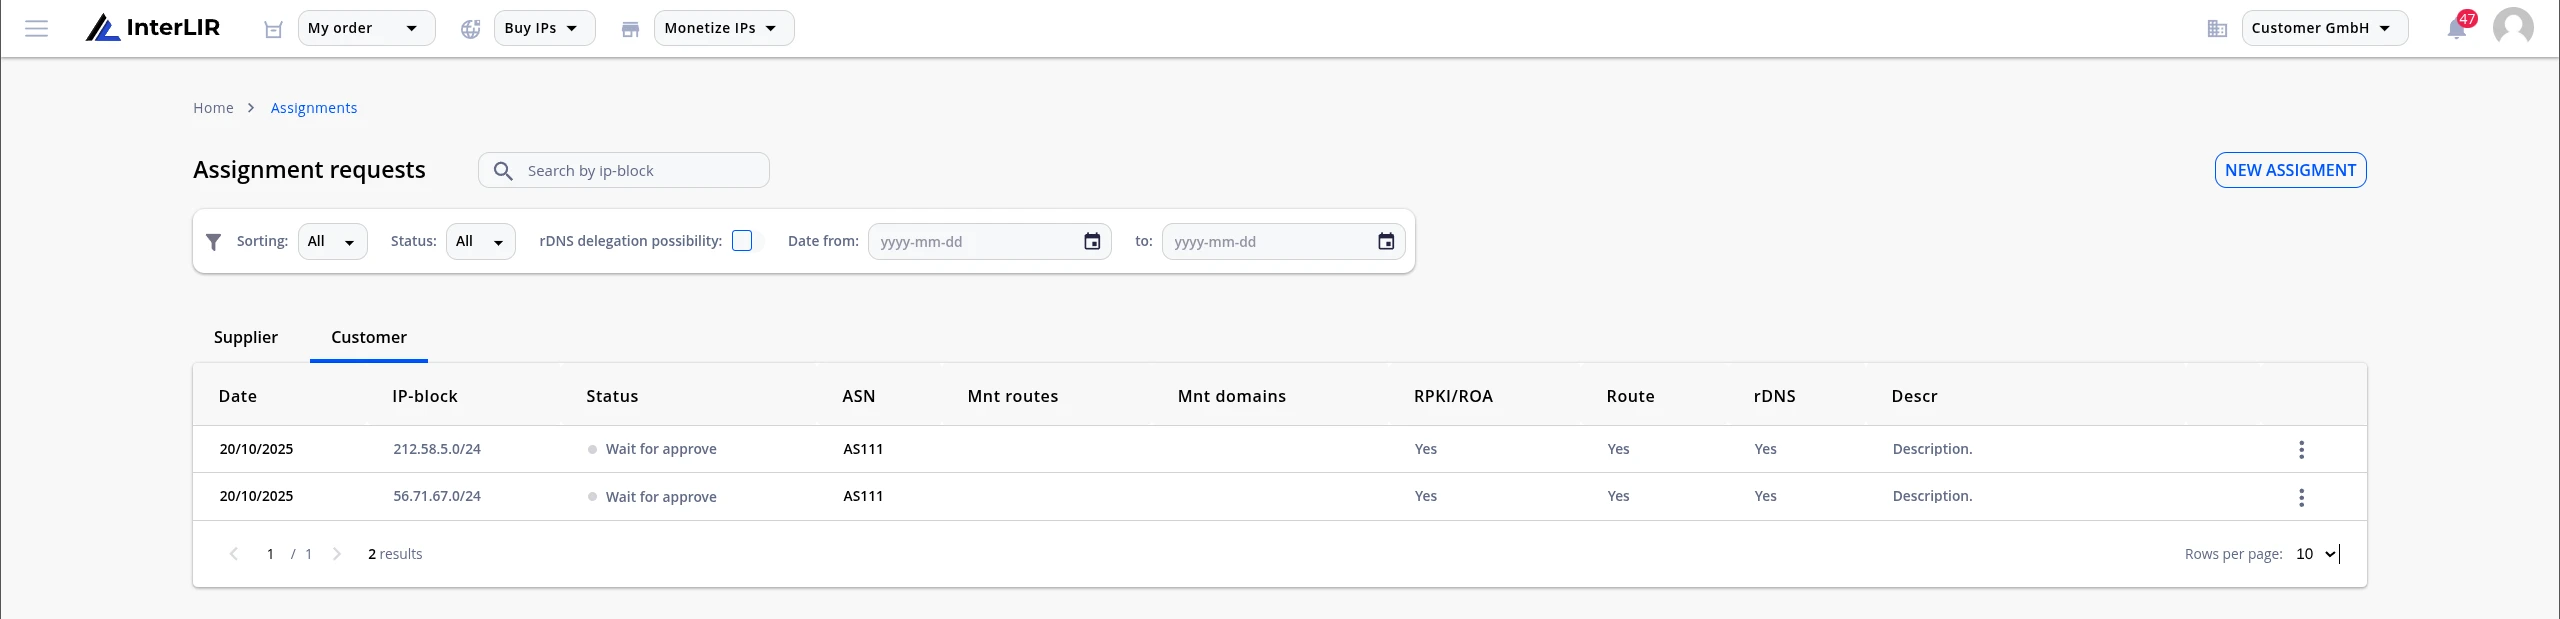
5. Approval Workflow
- InterLIR staff will review the request.
- Upon approval, the status will become
Waiting set RPKIand the request will be passed to the Supplier.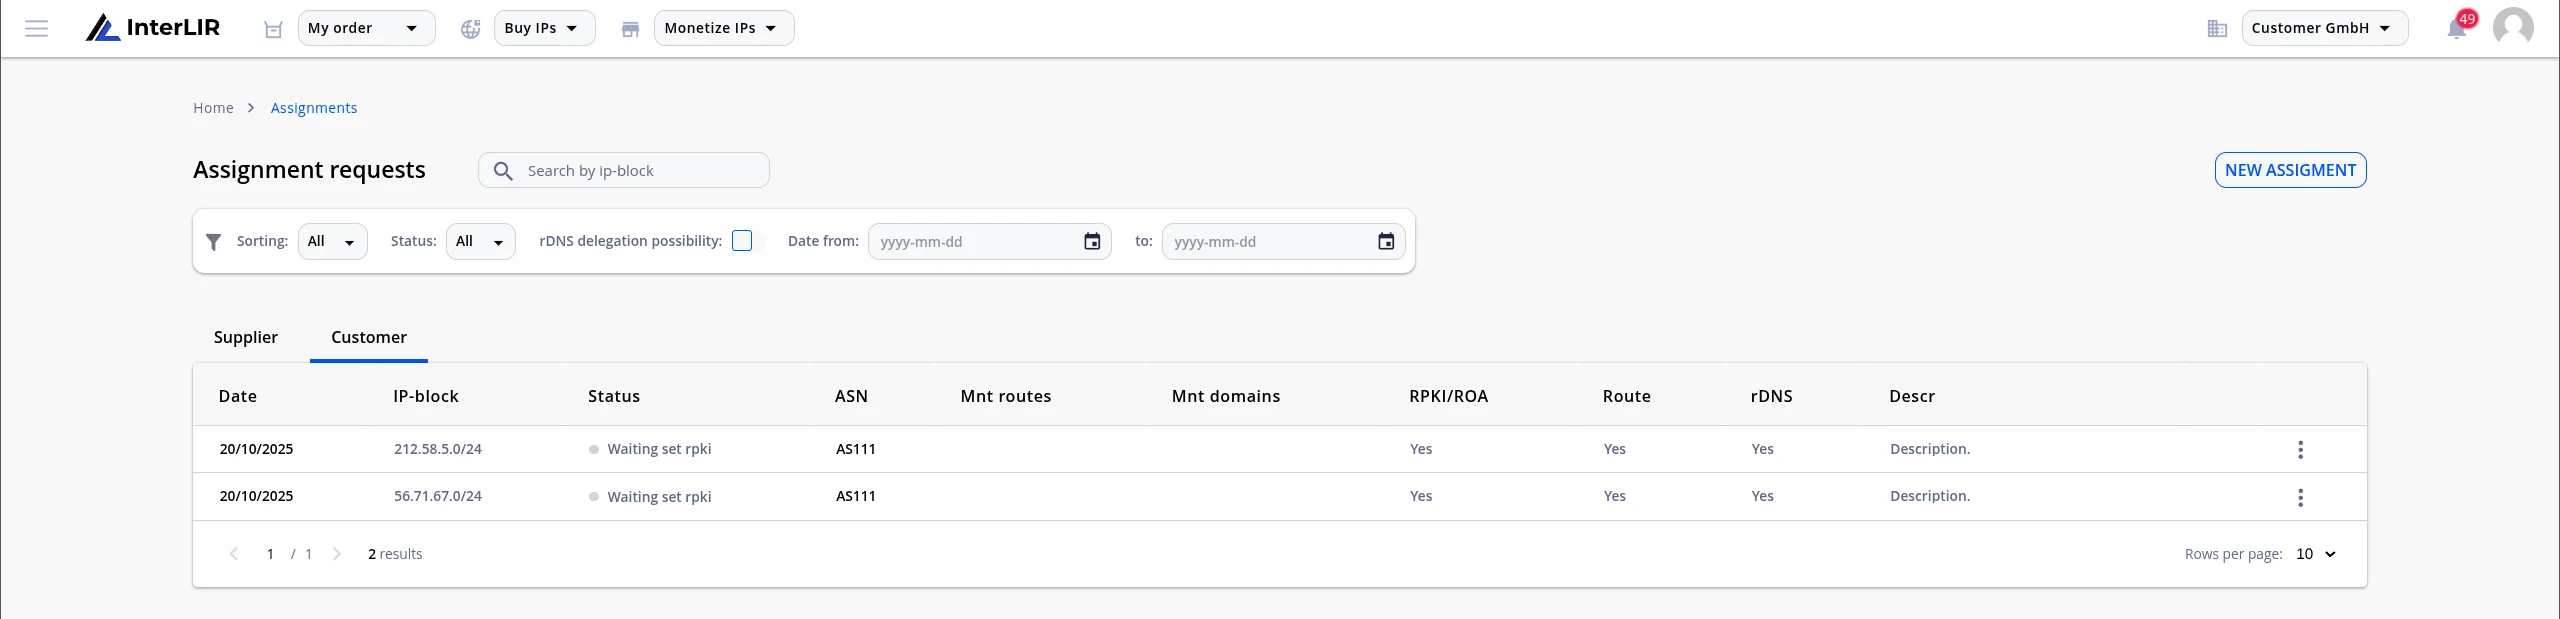
- The supplier will configure RPKI, ROA & Routes, and the status will change to
Approved.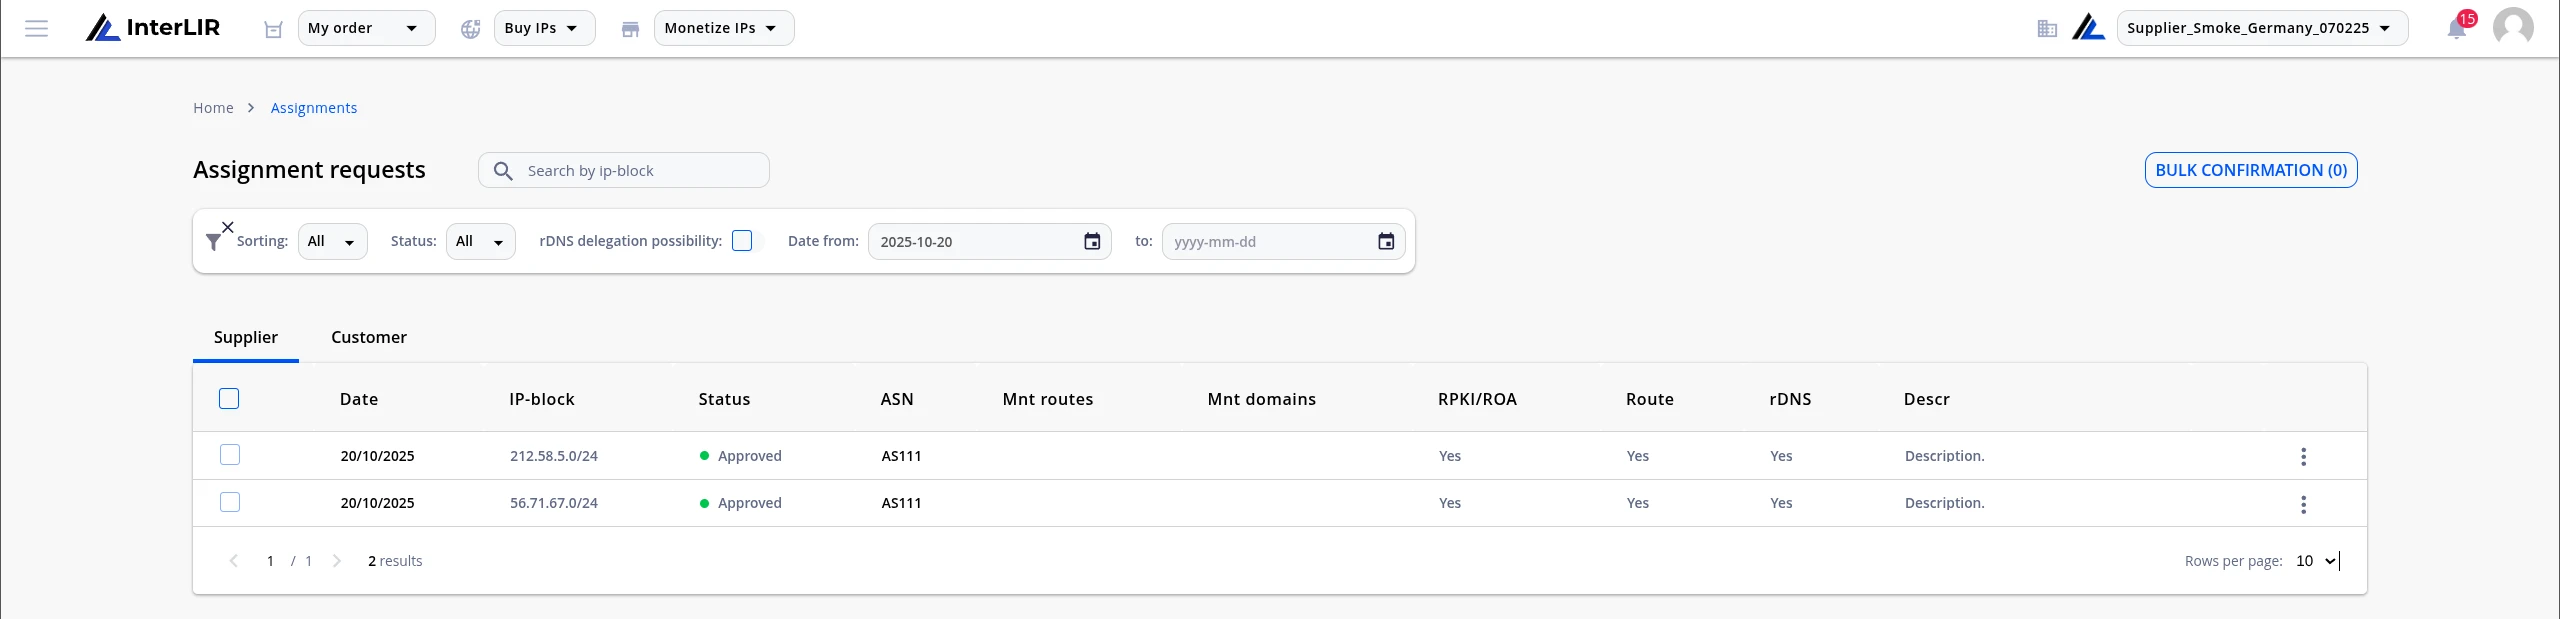
6. Activation
After the final verification by InterLIR staff, the request will receive status Active.
You can now:
- Download the LOA (Letter of Authorization) if the AR is in
ApprovedorActivestatus - Access the Reverse DNS request section in the AR details to submit an rDNS request (if the supplier allows it)

7. After Subscription Cancellation
When the lease is canceled:
- The AR enters the
Waiting delete RPKIstage - Once the supplier removes routing objects and confirms deletion, the request status becomes
Expired
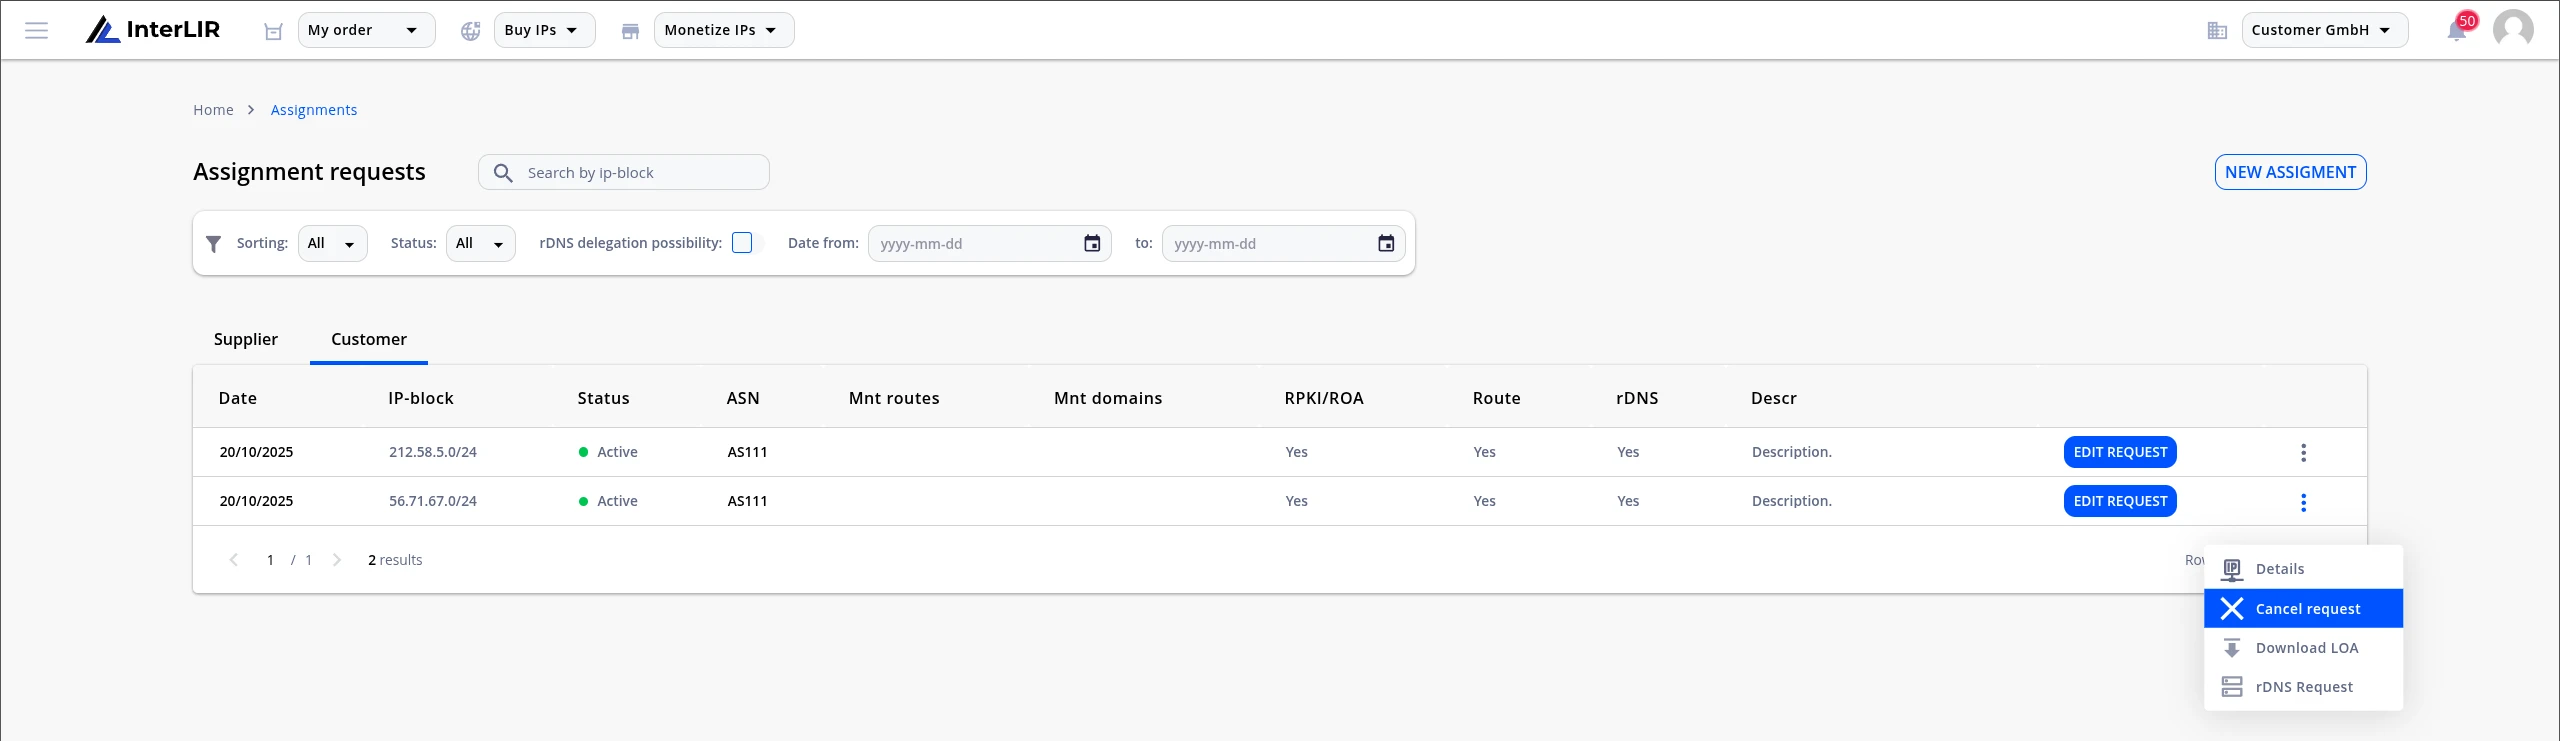
8. Editing or Canceling an AR
You can:
-
Edit your active AR
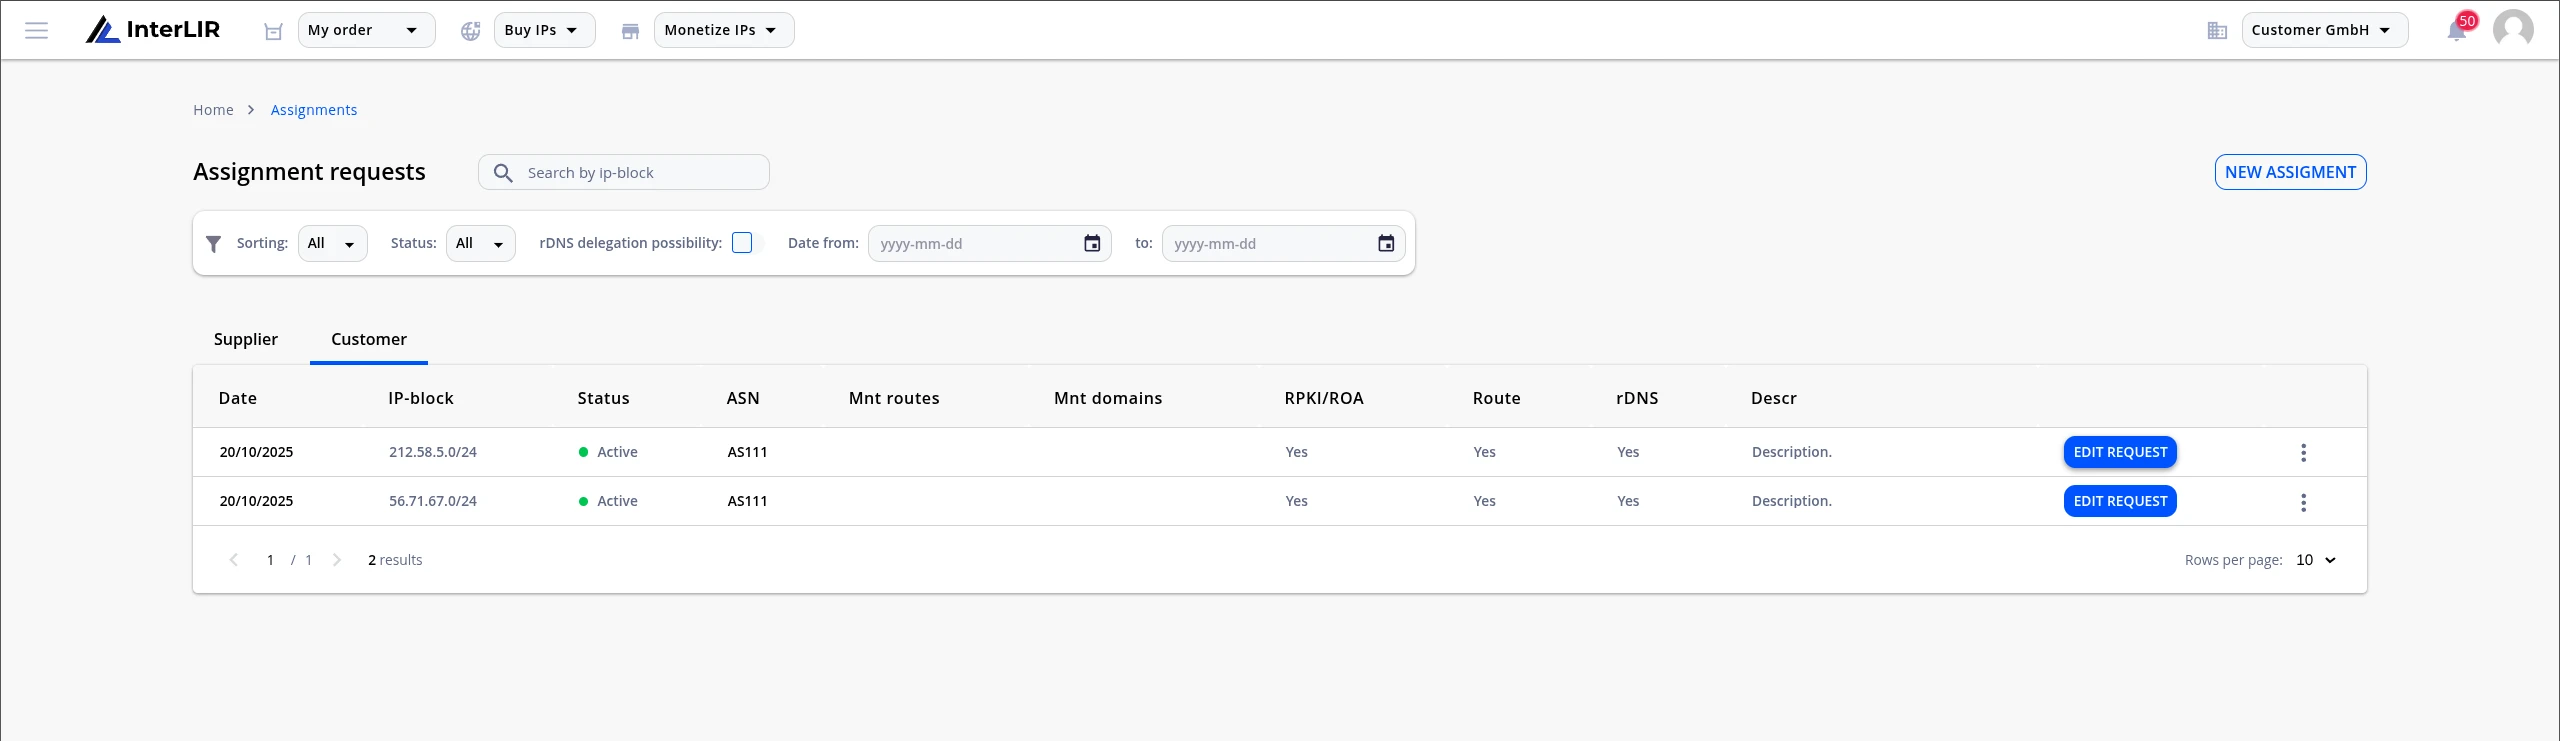
- This cancels the old request and creates a new one with updated information
-
Cancel the AR using the context menu next to it